Take our 1 minute quiz and find out how we can help you achieve your dream
Take the quiz

Fighting condensation and mould this winter

Help! My walls are starting to grow green and there is water dripping from my windows! What is CONDENSATION? I NEED DAMAGE CONTROL!

It’s definitely that time of year again. With the icy chill of Melbourne winters, it’s no wonder that we’re fighting to keep our homes warm in these cooler months.

However between heaters blaring, clothes drying, kettles boiling, and just generally breathing, we probably don’t realise that all the things that keep us toasty and warm are contributing to the moisture in the air and temperature profile of our homes. But why does moisture matter?

What is condensation and how can it be identified?

Condensation is caused by humidity in the air from general everyday living. Moisture is absorbed into the atmosphere of your home and then when the home begins to cool, the moisture comes down to rest on cool surfaces resulting in condensation.

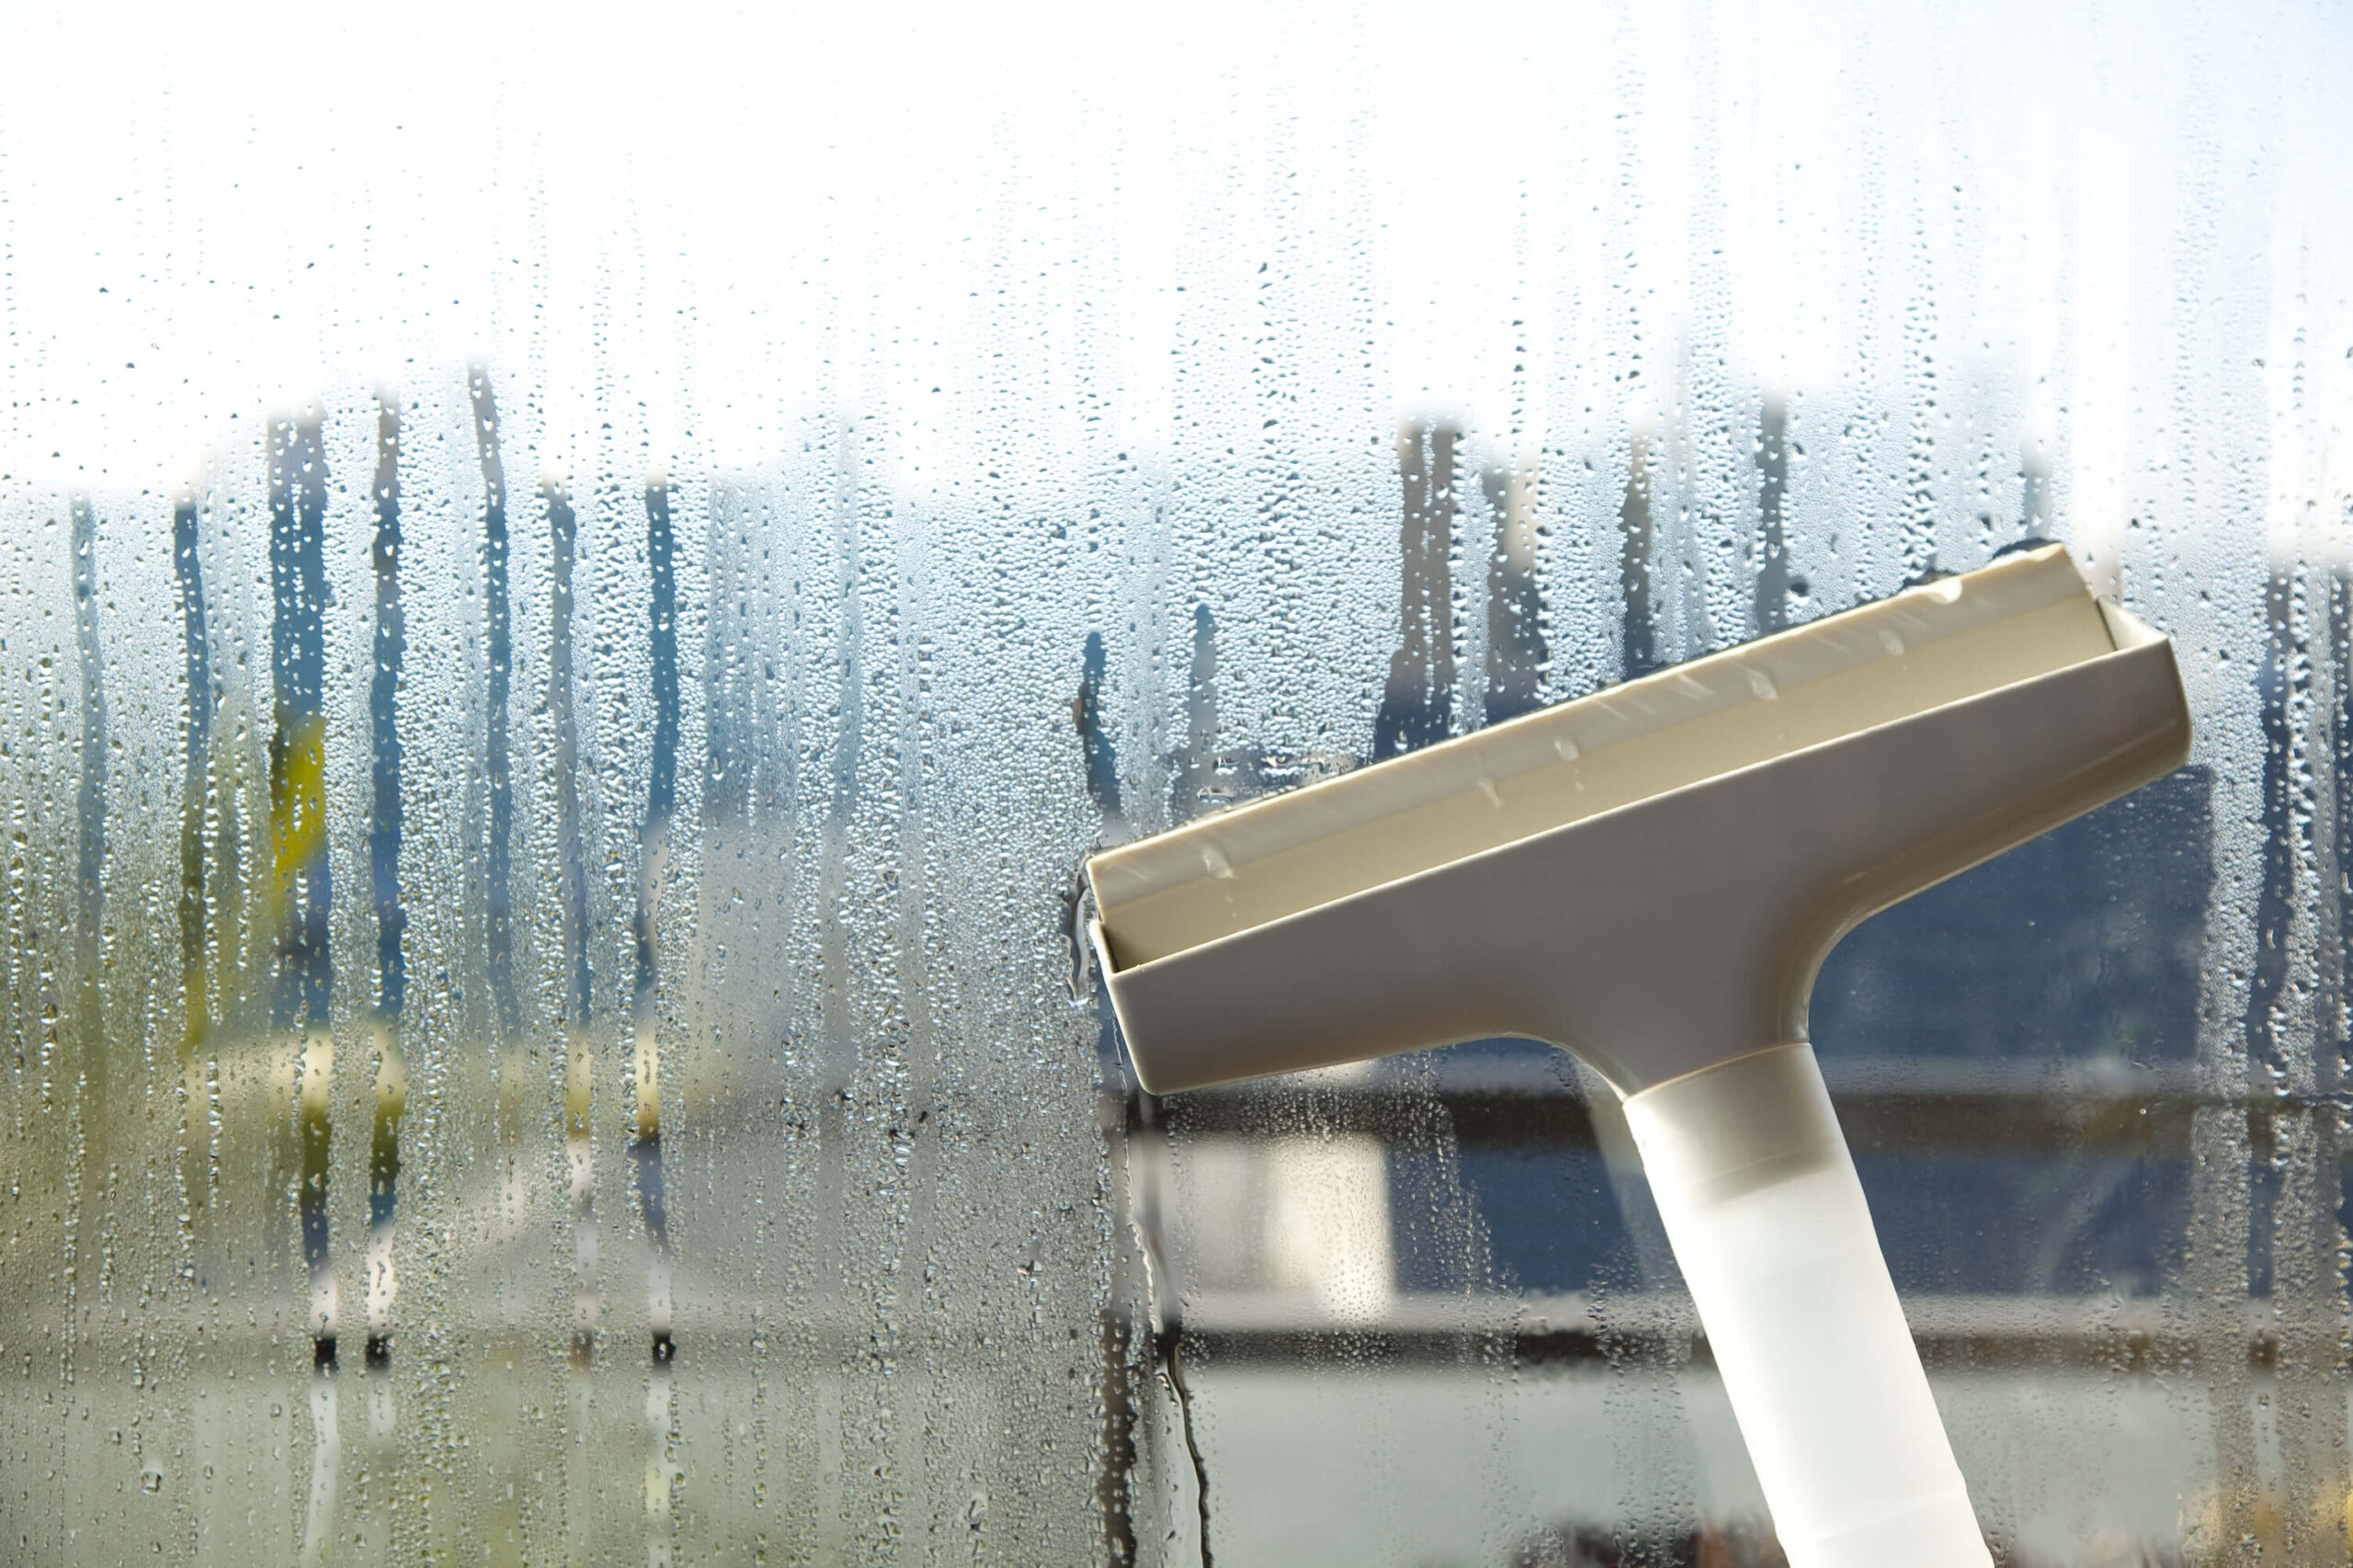
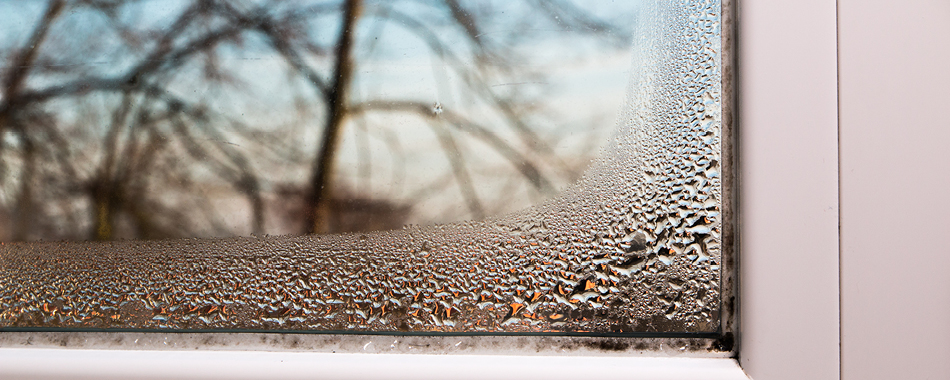
Identifying condensation is reasonably straight forward. The giveaway is moisture dripping and collecting on the inside of windows and their sills. Condensation is most noticeable on non-porous surfaces, as the moisture is not absorbed, making it easier to spot as it sits on top of the surface.

However, condensation can settle on any surface and may not be noticeable until you have a small spread of green mould growing in the affected area.

How can you prevent condensation in your home?

To help you keep your home climate and atmosphere in a condensation free sweet spot, here are some preventative tips to help get you started:

1. Open your windows.

Proper air flow through the home is vital in the prevention of condensation. It helps the humidity and moisture in the air escape, while also regulating temperature.

2. Turn on your range hood.

Simply boiling the kettle or cooking on the stove top can significantly contribute to the humidity in your living spaces. Luckily your range hood is designed to suck up some of the moisture caused by these activities – you just need to make sure you turn it on!

3. Turn on your exhaust fan.

Whether you are showering, tumble drying clothes or simply leaving wet items to dry inside, remember to leave the exhaust fan running to help that moist air escape.

4. Run the dehumidifier setting on your split system.

Most newer split systems have this option, so it is worthwhile running this setting for a few hours a day to see if you can noticeably reduce the amount of moisture in your home.

What happens when preventative measures aren’t working?

If you are doing everything to prevent condensation, but still have those pesky droplets running down your windows, it is important to make sure you are regularly wiping down affected surfaces to prevent the moisture from building up. Not wiping the surfaces that are damp can not only cause damage to areas such as skirting boards and joinery, it can also cause the sudden growth of mould.

While mould isn’t exactly a pretty sight for any home owner or tenant, the visual elements are not the most concerning; mould can also cause serious health problems if left untreated, so it’s in your best interests to take actions to remove it as soon as possible.

How to treat and prevent mould

In the event that condensation has gone on to create mould, you will need to act swiftly to treat the growth and prevent its spread.

1. Wipe down the infected area.

Using a test patch first, dilute a small amount of bleach in water and use this to clean the mould from the surface. If you are looking for a natural alternative, white vinegar is also a great option for cleaning away those pesky green mould spores.

2. Make surfaces less hospitable to mould.

Anti-mould preventative can be added to normal water based paints for a more permanent solution. Of course, if you are a tenant make sure to ask your property manager first before repainting or painting any walls!

3. Purchase a de-humidifier.
Failing the dehumidifier setting in your split system, a more permanent option is to purchase a standalone dehumidifier. These are designed specifically to extract excess moisture in the air, stopping condensation in its tracks and preventing the moist environment in which mould thrives.

Condensation can seem scary and unmanageable but when you break it down and make small changes to keep it at bay, you will find the little things make the world of difference!

Are you concerned about condensation and mould as a tenant or landlord? To discuss your options in the fight against these issues please do not hesitate to contact one of our property managers today.

This article was first published in July 2017.

A landlord’s and tenant’s guide to vacating

Vacating a property can be a daunting experience for both tenants and landlords, if you don’t know what to expect. Tenants can get stressed about not receiving their full bond after they leave a property and the landlords stressed that their property won’t look brand new. But vacating doesn’t need to be a stressful experience, as long as you remember these key points:

For Tenants

  1. Always refer back to your condition report

    You will have received a condition report when you first moved into the property, noting the state the property you have lived in during your tenancy was when you picked up the keys. Referring to this report will help you return the property back to how you received it. If you do not have access to your original condition report, don’t be afraid to ask your agent to send this to you prior vacating.

  2. You will need to do a full clean – but whether this is done professionally is up to you

    It is preferred that you reach out to a cleaning agency to do a full clean of your property. however this is not necessarily required if you have the patience and will power to do so yourself. Just remember if your property manager is not happy with the standard of cleaning when they complete their final inspection, they will ask you to remedy the issues.

  3. If there’s carpet staining, you will need to steam clean

    While many agents will ask you to steam clean carpets at the end of a tenancy (it’s a nice thing to do), you don’t strictly have to steam clean unless the carpet has been stained. If staining has occurred, you will need to make sure you do everything you can to clean up the damage.

  4. Don’t leave anything behind!

    Look around the property before you leave to ensure nothing is left inside. Also, don’t forget to check external areas like storage cages or garages and make sure you’re taking everything with you.

  5. Let your property manager know if there is any damage

    If anything has been damaged prior to vacating it is crucial to advise your agent well before vacating so you can tackle the issue together. This saves headaches in the long run and any claims against your bond.

  6. If your rent is paid up to date and the property is brought to the original condition as per condition report, with no damages or items left in the property, you will be guaranteed your bond!

For Landlords

  1. Wear and tear happens

    While it would be great to have a brand new property remain in the exact same condition over time, you need to take in consideration wear and tear is natural and should expect this with every vacancy.

  2. Your tenants don’t have to steam clean your carpets

    Your property manager can ask and recommend your tenants steam clean, but they’re under no obligation to do so – unless there is staining.

  3. Consider maintenance and refresh opportunities between tenancies

    It is advised an owner should be maintaining their property every seven years, to ensure they’re property continues to compete well in the market and command the best rent. This could include painting, re-grouting showers, changing carpets or having them dry cleaned after a tenancy. It’s a lot easier to complete these maintenance activities in between tenancies, so if you receive notification of a tenant vacating and think your property could use a bit of an update, now is the best time to do so.

Whether you’re a landlord or a tenant, your property manager is here to help you make the vacating experience as painless as possible. We want to make sure all parties are happy; to ensure the property is returned in a reasonable condition appropriate for releasing, minimising the vacancy for the landlord and getting the tenant back their bond.

Need help finding a new tenant or want to learn more about your property’s rental potential? Click here to request your free rental appraisal or get in touch with the team here.

7 tips to tackle condensation this winter

Pets in your rental property – how the rules are changing

In September 2018 The Residential Tenancies Amendment Bill 2018 was passed through the Victorian Parliament, with the aim to “increase protections for renters, while ensuring rental housing providers can still effectively manage their properties.” While these changes don’t come into effect all at once, they will be implemented by July 1 2020.

Of the more than 130 reforms to be introduced, one particular change has had many people talking; the new rules applying to a tenant’s right to a pet.  In fact it’s made many landlords worried that they will get no say into whether a pet can be housed at their investment property; however this fear may be unfounded.

If you read the new legislation carefully it actually stipulates that potential tenants will need to apply for properties with their pets listed on their application – or should they wish to get one at any time throughout their tenancy, they will need to submit a formal request to their landlord. A landlord then cannot unreasonably refuse the request for a pet unless a valid reason is given (such as the dog is a large breed for a small one bedroom apartment or the property owner has an allergy).

If a pet is approved, tenants will still be required to sign a pet clause. If the request is denied, your tenant will have the right to submit a request to VCAT allowing a member to review your refusal. Failure by the landlord to supply a response to a pet request within 14 days will result in automatic approval to the tenant – however the landlord can still make an application to VCAT to have an order put in place to refuse the request or have a pet removed should there be damages or issues in your tenants home caused by their pets.

While this change does explicitly provide tenants with the right to a pet, it also makes landlords rights clear; something which was previously missing in the Residential Tenancies Act. Previously there was nothing in the legislation regarding pets, a fact which often negatively impacted landlords rather than a tenant. From personal experience most cases that ever made it to VCAT regarding the removal or denial of a pet in a property were always skewed in favour of the tenant’s interests, with the argument made that as there is nothing in legislation that says a tenant can’t have a pet, then a landlord can’t discriminate against them.

With this change coming into effect within the next 12-18 months, landlords will now have the right to legitimately refuse a pet in their rental property and have their voice heard in VCAT if necessary. There is also the provision to allow for a pet to be removed from a property if it’s causing damages or a nuisance, as opposed to the usually three breach method which is often ineffective and does not usually result in a pet’s removal.

I’ll admit – when I first heard that these pet laws were changing, I was nervous. However after taking the time to analyse the change and learn what the legislation really says, my concerns have been relieved. I believe that including wording around pets in the Residential Tenancies Act goes a long way to providing our landlord clients with clear rights to support them moving forward.

Have questions about the upcoming changes to the Residential Tenancies Act and what they might mean for you? Get in touch with a Property Portfolio Manager at The Hopkins Group today!

Disclaimer: The information contained herein is general in nature and does not take into account individual situations, needs or goals. It should not be relied upon and persons should satisfy themselves through independent means that any decisions based on this material are appropriate. We recommend that you consult with your adviser who will be able to make a recommendation based on your specific circumstances.

Share house survival guide

When you’re young, studying or at the start of a career, living on your own is usually not an option. Often you’ll be living on a shoe string, especially when pays aren’t rising as quickly as rents. So where does that leave you? Well, if living with family just a little longer isn’t an option, then share housing is usually your next best bet.

Sure, share housing has its reputation – it can be fun, crazy and frustrating – but despite all the housemate horror stories you hear, it’s really not all bad! To help you make the transition as easy as possible, here are the top three tips I’ve picked up along the way.

1. Splitting expenses is easier with apps

Budgeting for household expenses like cleaning supplies, communal food, bills etc. can be tedious – but thankfully, there are apps out there that make things easier! To easily keep track of things, my housemates and I use an app called Splitwise. When expenses come up we just enter it into the app and divvy it up accordingly. For example if I go out to buy cleaning supplies, I take a photo of the receipt and put the total in the house group. People can then pay when they have the chance, and we know exactly who owes what and to whom. It’s great for keeping those ‘forgetful’ housemates accountable.

2. Don’t forget to budget for bills and rent

It sounds simple – but if you don’t budget, it’s really easy to find yourself short when the bills are due. If you get paid on a weekly or fortnightly basis, it may seem like you have more spare cash than you actually have. One rookie mistake I made early on was not setting aside money for my bills or rent. It only took one week of eating beans and rice to realise maybe I should put some more thought into were my money goes.

A simple way to make sure bills and rent don’t creep up on you is to create a budget and stick to it. In an ideal world, you should know where you money goes and know when not buy so much beer. To help manage my slightly irresponsible spending habits I keep a second bank account open for all my bills. Each pay, I put a set amount into my billing account before I do anything else. At the end of the month I then have more than enough to pay my rent and when a bill comes up I don’t even have to think about it, everything I need is in my billing account. This leaves me free to do whatever I want with the rest of my money; good or bad.

While this system works well for me at the moment, it’s also great to know that when I’m ready to get a little more serious about understanding my spending habits, things like The Hopkins Group Money Master program exist. Money Master gives you the power of the Xero Cashbook platform, linking with your bank accounts and budgets to shine a spotlight on what you’re spending and where you might need to cut back. You can learn more about Money Master here.

3. Communication is key

Having open lines of communication with your housemates is the make or break of any good share house. How this is achieved varies from place to place; some have house meetings, others have notice boards, but my place has a group chat set up on our phones.

We all live busy lives, so when we need to sort things out the group chat helps immensely. From finding out who will be home for Border Security night, to discussing the need for a new vacuum cleaner and uncovering why the electricity bill so high this month, the group chat keeps us all on the same page and helps negotiate the larger house expenses.

If you’ve never lived in a share house before, it can be an equally exciting and scary idea to get your head around – and while I can’t help you figure out who keeps eating your food, I do hope these tips will help you start your first foray into the life of renting on the right foot! And who knows – once you’ve mastered budgeting in a share house, you might soon be ready to move out into a new place of your own! When that time comes, The Hopkins Group is here to help with a number of great properties available for lease across Melbourne. Check out our current availability today!

How to keep a clean rental home

We are all busy these days. Between family, work and play it can be incredibly difficult to find the time to clean your home. It’s not exactly something many people look forward to doing after all!

However when you do manage to finally set some time aside to roll up your sleeves and get to scrubbing, it’s always a good idea to arm yourself with the right products. To help you out, I’ve put together a list of my go to supplies that will have you cleaning smarter not harder; allowing you to give your rental property the deep cleanse and clean it deserves.

But before we get started, I need to cover a couple of disclaimers. The following list contains my personal preferences and is by no means a sponsored post. It’s not necessarily the brand that’s important in this discussion; it’s more about what the products do and how they work that matters. I also haven’t been particularly environmentally conscious in my selections; but I do think they’re effective at getting the job done.

Secondly, please spot test before you go hard with any of these products. We’d hate for you to follow in one of our team member’s footsteps and create staining in your bathroom because a product designed for ceramic tiles doesn’t sit well on slate!

Now that we’ve got those points out of the way – let’s jump into the list!

Bathroom

The one room we all hate to clean! But let’s face it – neglecting to clean your shower can cause a build-up of soap-scum and in worst cases, mould spores. Gross!

To overcome these issues, I recommend a product like Shower Power combined with a mild abrasive sponge. Spray the product on the glass, tiles and base and leave to sit for 10 minutes. Wipe over, rinse with hot water and voila – look at that bathroom sparkle!

Look at that bathroom sparkle!

For those who have left the cleaning a little longer than expected, resulting in mould on shower tiles and in the silicone, I recommend using Exit Mould. For this product, you’re going to follow the same instructions you would with the Shower Power but instead allow to sit for 20 minutes before wiping over.

Bye bye mould!

Kitchen

Arguably one of the most important areas of your home to keep spick and span, next to the bathroom, it’s very easy to let the cleanliness slip in the kitchen if you’re not paying attention. All it takes is cooking on your stovetop for the grime to start building!

Dependant on your type of stove top you will need to choose the appropriate surface cleaner.

Gas stove tops should be cleaned with stainless steel surface spray and a non-abrasive sponge/cloth. Spray on, wipe over surface with sponge then follow with a dry cloth.

Look how clean your stainless steel is now!

Electric hobs/glass induction cook tops should be cleaned with a product like Cerapol. Simply switch on your stove top to a low heat, apply the Cerapol cream to the surface and use a cooktop scraper to remove burnt on grime and marks. Wipe with a damp cloth and BOOM, good as new!


Kitchen tiles should be wiped over regularly with a general multi-purpose spray and wipe, but if you find that it’s failing to get the grout back to its original colour the next best thing is to use a product like Gumption.

To use, take a mild abrasive sponge apply the paste to tiles and work into the grouting. Wipe away with a damp cloth and see your tiles be restored back to their former glory in no time! Same rules apply for bathroom tiles (wall and floor).

Walls

You probably don’t notice, but it doesn’t take much to mark-up walls. Luckily, it usually doesn’t take much to clean them up either!

There are a couple of ways you can clean your walls – the first being a product containing sugar soap. You can get this product in individual wipes, but for larger wall surfaces a spray bottle format is probably your best bet. Make sure your paint is a wash wear before applying, then liberally spray the wall with the sugar soap and use a soft damp cloth to wipe down.

For smaller areas, Magic Erasers also work really well. Take a small part of the sponge, run under water of a minute and wipe those marks away!


Floors

Hardwood floors require a hardwood cleaner to keep them looking their best; in this instance I recommend a product like Earths Choice Wooden Floor and Surface Cleaner. Alternatively, a dust over with a microfibre cloth can also work wonders for those times a deeper cleanse isn’t necessary.

Carpets are best maintained by having steam cleaning done every six months, however for spot stain treatments I can’t go past Preen for Carpet. It is FANTASTIC at lifting every sort of stain you could imagine and definitely worth having on hand if you have large carpeted areas.

So there you have it! These are my go to products that will hopefully keep you keep your home sparkling and fresh. But this certainly isn’t an exhaustive list – so if you are still unsure as to which products would work best at your rental property, please don’t hesitate to call on one of the property managers here at The Hopkins Group; we would be more than happy to help! A clean home equals a happy owner and property manager after all!

Lauren Wilden-Ross is a Senior Property Portfolio Manager and a cleaning enthusiast! When most people are catching up on Netflix over the weekends, you’ll find Lauren rocking out in her rubber gloves and apron. All of these recommendations are personal and by no means endorsed by a professional cleaner. We have not been sponsored for this post but have drawn on years of experience from advising tenants on the best ways to keep their rentals clean. We hope it’s a useful guide but The Hopkins Group does not take any responsibility for any damage that occurs as a result of a misuse of products. Please read all warning labels prior to using as part of your cleaning routine.

Top ten tips for applying for rental properties

These days, it’s getting more and more difficult to find your dream rental property, and if you do, it’s as if everyone else has their eyes set on the same one. With minimal vacancy, it seems that properties are leasing just as quickly as they are coming on. So how do you give yourself that competitive edge? Here are my ten top tips to help you get ahead of the game!

1. Be prepared

Many agencies now take a 1form application. In fact, most agencies now prefer it. You can complete the 1form application ahead of time and when you are ready to apply for a property it’s already done and good to go!
If you are super keen on a property and don’t know if they take this method of application, a simple call to the agency will let you know. If they don’t use 1form, the call gives you a good opportunity to request an application form that they do use.

2. Ensure your details are up to date and correct

As a property manager, it can be tough contacting references because of the number of phone numbers that are outdated or incorrect. Check and then double check; especially if you’re using 1form. People use their old applications to apply for properties because it’s the quick option but they forget to update their details and the details of their references.

Also ensure you apply with your legal name. Don’t list your nickname or even the ‘English version’ of your name. We require your legal name for all documents.

3. Notify your references

Property managers will conduct checks on the information provided on your application form by contacting your listed references. A lot of people forget to notify their references that they are applying for properties and this can delay the process significantly. Unaware references won’t answer their phone or call back if they don’t know who we are. Also, due to the privacy of the applicant, they may be reluctant or unable to provide details regarding your employment or previous rental history without your authority, and this delays the process all the more.

4. Ensure you supply adequate proof of identity

As part of leasing the property, we need to be sure that you are who you say you are. This is for background checks and for document preparation amongst other things.

5. Register yourself for inspections

A lot of agencies now use third party programs (such as InspectRealEstate) or have an in-house process to assist with registering details so you can be notified of inspections. Try to get your details registered wherever possible so you can be kept up to date with information about when the property is available to inspect, when there’s updates to inspection times (changes, cancellations, etc.) and if the property is leased.

6. Check the internet daily

New properties are published online every day, even multiple times a day. Look regularly! Sometimes properties will come on but by the time you spot them an inspection has already been conducted and you have missed out.

7. Attend inspections

To try and get applicants through the properties as quickly as possible, agents will list properties as ‘open for inspection’ during the current tenancy. However, this means that the agents are limited to times set by the current tenants and their availability. Agents cannot always provide a private inspection in these cases.

Whilst the times may not always be convenient for you, it’s important to try your best to attend inspections. It will give you the chance to see the property in person but you’ll also be able to meet the property manager and familiarise yourself with them and the agency.

You might not get the property the first time, but gives you the chance to chat to the property manager about similar properties. That way, you’re in the forefront of their mind and they can refer you to similar properties that become available.

8. Only apply for what you really want

All too often I get multiple applications from people who are just applying for anything and everything without inspecting or even really wanting the property! This means the property manager will spend a significant amount of time scouring through applications to find the applicants that genuinely want the properties.

A rule of thumb is to inspect the property first, then apply. If you are unable to attend the inspection, contact the agent and explain the situation. Some agencies will process based on-sight unseen provided they know you are genuinely interested; that is, they’ll process your application on the basis that you are happy to lease the property without having seen its condition.

9. Don’t put all your eggs in one basket

Whilst you shouldn’t apply for anything and everything, don’t limit yourself to just one property. Go to a few property inspections and apply for those you genuinely are interested in – and don’t leave it too long to apply!

You may not get the first property you apply for but that doesn’t mean your application isn’t any good. It can be a tough decision for owners and they can only choose one applicant.

But, if you are successful in securing a property, make sure you notify the other agencies of your cancellation on any other applications.

10. Be available to reach!

Property managers will sometimes have questions regarding your application or require further information. The easier you are to reach, the easier your application is to process. And if you’ve been approved, the easier it is to pass on good news!

Are you looking for your dream rental property? Now you’ve got the tips, it’s time to apply! Check out our current listings or contact out property management team today!

How to apply for NRAS in 10 simple steps

Are you getting bogged down when trying to submit your application for a property under the National Rental Affordability Scheme (NRAS)? Let us help make the process easy for you.

Step 1
Check that you’re eligible

Ensure that you earn below the income cut off for your household composition (check out current limits here).

Income levels are assessed against gross income limits, according to the household composition; that is, everyone who tenants the property. Everyone who is to live in the NRAS home must have their income included as a member of the household.

When first applying for an NRAS property, the household’s gross income for the 12 months prior to commencement of tenancy must be equal to or less than the relevant income limit for the household’s composition (i.e. the first column in the table above). After tenanting the property, household income may then increase above the income limit. However, a dwelling ceases to be eligible for an incentive if the tenants’ household income exceeds the applicable household income limit by 25 per cent or more in two consecutive eligibility years (i.e. the second column in the table above).

Step 2
Get in touch with the property manager

Contact the listed property manager, to provide you with an NRAS application. Note that NRAS applications are NOT completed on 1Form as per other properties; there is an alternative application process.

Step 3
Read everything in detail

Once you have received the NRAS application from the agent, please ensure you read through ALL documents carefully as there is a lot of information that needs to be provided along with supporting documentation.

If you fail to submit all documentation, the process will take longer and you will run the risk of losing the property to somebody who has supplied all the relevant documents.

Step 4
Complete the NRAS Income Questionnaire

Fill in the NRAS Income Questionnaire (provided with application forms).

Step 5
Fill in the tenant consent form

In the address section you need to put in the address of the property that you are applying for, not the property where you are currently living.

Please leave the Dwelling ID and Housing Provider sections of the form blank, as these are for the property manager to complete.

Step 6
Fill in the residential tenancy agreement

This must be completed with all of your details, employment and rental history. Please leave the NRAS tenancy checklist blank for your property manager to complete.

Step 7
Prepare and supply all supporting documentation

In order to finalise your tenancy application there are a range of documents that are needed in order to support your application.

We require:

Primary documents

Gross (before tax) employment income (from all employers)

  • 12 months’ worth of bank statements
  • Three recent payslips
  • PAYG payment summary or Notice of Assessment for financial year ended 30 June 2017.

If you are self-employed we will require proof of income

  • Profit and loss statement for 12 month prior to assessment period
  • Statutory declaration confirming the net income for the 12 month period prior to assessment period
  • Business account bank statement

If you receive Centrelink Allowances and Pensions

  • Centrelink payment history report for 12 months prior to the assessment period
  • Most recent income statement

Other documents

If you have received financial support from family/friends

  • Statutory declaration confirming the source of income and the amounts received during the 12 month period

If you received a scholarship or grant

  • Letter from the institution providing the scholarship or grant and confirming of the amount being paid

All other income

  • Statutory declaration confirming the source of income and the amount received during the 12 month period prior to assessment

No Income

  • Statutory declaration confirming that no income was received from any source during the 12 month period prior to entering a lease.

Step 8
Submit your application

Once you have the documents required for your situation please send through an email to your property manager, with all documents attached, or come into our office to hand in a hard copy of your application. Supplying all documentation all at once makes the process much faster and you have a better chance of being approved.

Once we have received your application in full, we will process this for review with the housing provider.

Step 9
Wait for your eligibility to be confirmed

Once confirmation of eligibility is received from the housing provider, we will put forward your application for approval by the owner. The assigned property manager will call to update you of the outcome, usually within 48 hours of receiving eligibility and approval.

The NRAS application does take some time, so patience is key during this process. Once the application is lodged with the housing provider, it does become a waiting game – but you can be assured that you will be kept you informed as updates become available.

Step 10
Owner approves application

Once you’ve met eligibility and have been approved by the owner, CONGRATULATIONS! You’re now ready to organise a move in date and settle in to your new home.

NRAS can be confusing – but carefully following these steps can simplify the process. If you have any questions about NRAS or about current rental availability, please do not hesitate to contact The Hopkins Group today!

Want to learn more about NRAS? Watch this helpful video for an overview of the scheme and what you need to know before applying. 

Looking for property to lease? Check out The Hopkins Group’s current listings.

Routine inspections explained

As part of the property management service we provide to landlords and tenants, our property management team likes to ensure that rental properties in our care are inspected on a regular basis, in accordance with the Residential Tenancies Act 1997.

These routine inspections are beneficial to tenants and landlords alike, as they are designed to determine any concerns with the ongoing tenancy and rectify where necessary.

It’s important to note that a routine inspection is not a housework inspection. Rather the inspection is carried out by property managers on behalf of the owner to ensure that the property is well cared for and to see if there are any maintenance or health/safety issues that may need to be rectified for the tenant.

How frequent are routine inspections?

The first routine inspection is usually carried out no earlier than three months after the tenancy commences. Thereafter, additional inspections can occur every six months.

If a property needs to be inspected prior to these set inspection intervals, the only way a property manager can do so is if the tenant is agreeable.

What can I expect as a tenant?

When you’re due for a routine inspection, your property manager will send notification of when the inspection will take place. You are not required to be present for this inspection if the office holds spare keys. In the event the office does not hold a spare key you will be asked to provide access.

During the inspection process, the property manager will take photos of each room and of any maintenance issues. While the property manager is not seeking to photograph anything personal, if there is anything you would prefer not included in these photos please ensure that these items are out of sight or you advise your property manager accordingly.

After the inspection, if your property manager notices anything of concern they will let you know and provide steps for you to rectify the issue(s) as appropriate.

What should I do to prepare?

As a tenant, you are leasing out someone’s investment property. Sure, you call that place home, but the property is owned by someone else; and your landlord wants to make sure you’re taking care of their asset. A happy landlord makes a happy tenant – and vice versa – so here are some things you can do to impress:

  • Ensure the property is clean and tidy
  • Dust, sweep/vacuum all surfaces
  • Wipe down and clean kitchen and bathroom surfaces
  • Remove any mould from surfaces/grout
  • If applicable, ensure lawns are mowed and gardens are tidy
  • Tidy up any outdoor areas

A good thing to keep in mind is that if you clean your home regularly, you have less to do when a routine inspection comes around. Treat the property as if it was your own, and you’re on your way to passing your inspection with flying colours!

What happens if I have maintenance issues to report?

Your property manager will include a maintenance request form in their email notifying you of an inspection time.

If you have anything to report, you can complete this form and leave in the property, ready for collection during the inspection.

However you shouldn’t wait until your inspection to report maintenance. It’s best to report any issues in writing to your property manager as soon as they occur/are noticed. This can be done via email to your property manager or this form on our website.

What can I expect as a landlord?

Your property manager will send you an email notifying you of the timing of the planned routine inspection. As a courtesy, you will be invited to attend the inspection of your property; however you are not required to attend if you are unable to.

As a landlord, if you would like to attend the inspection of your property but are unavailable during the scheduled time, your property manager may be able to reschedule to a more suitable time (within office hours).

Whether or not you are in attendance, your property manager should always follow up to provide you with a copy of the inspection report along with photos. They will also notify you of any maintenance items raised by the tenant for your consideration/rectification.

Any further questions?

Routine inspections are regular part of the job for property managers, but hopefully now you have a better understanding of what’s involved for you as a tenant or a landlord. However if you’re still unsure, or have any other questions regarding your rental property, please do not hesitate to contact our property management team.

Five budgeting tips for first time renters

So you’ve finally decided to join the big wide world of independent living.  You’re looking for your first rental home, you’ve scoped out the areas and now you’re ready to find that perfect place to live.

Congratulations! You’re off to a great start – but hold your horses! Have you set yourself a budget?

No? That’s okay. We’ve got five tips to help you on your way.

1. Start by knowing your limit

Setting yourself a budget will help you obtain an affordable home; it’s all about spending within your means.

As a general rule of thumb your rent should not exceed 30% of your take home pay, give or take slightly depending on your lifestyle.

2. Get your bond and first months’ rent ready

People often fall into the trap of not making the allowance for all upfront costs and other everyday expenses that come along with renting a home.

First and foremost you must have your bond and first months’ rent ready to go.  Most agencies expect this at the time you sign the contract to secure the premises.

A common misconception among new tenants is that a months’ worth of rent is just their weekly rent multiplied by four. This is incorrect. Most months have 30 or 31 days so rent is calculated on a calendar monthly basis; this is the rental figure is due and payable each month.

How to calculate one months’ rent: Weekly advertised rent = $400

Weekly rent divided by seven = $57 per day

Daily rent multiplied by 365 = $20,857 per year

Yearly rent divided by 12 = $1,738 per month

If you consider the monthly rent here compared to what you would get if you simply multiplied your weekly rent by four (4 x $400 = $1600), you’d be short $138.

3. Remember your utilities

Let’s face it – you’re going to need water and electricity (and sometimes gas) to live. So don’t get caught out forgetting to account for these expenses.

Some utilities will also require a once off connection fee to be paid and whilst this is not ongoing, it is another cost that you need to have ready to go at the start of your lease.

4. Let’s not forget your peace of mind

One thing tenants often forget about is also one of the most important expenses to consider – insurance.

While it isn’t strictly a necessity, insurance does give you peace of mind and has the potential to save you thousands of dollars should disaster strike (think natural disaster, fire, floods or theft).

Renter’s insurance is generally an annual fee and is well worth considering.

5. Starting from scratch is an expense in itself

Once you’ve thought about all other expenses, it’s worth remembering that you will also encounter costs in the process of moving and making a home for yourself.

Part of this is factoring in any removalists costs, furniture, appliances and linen purchases.
And let’s not forget that you’ll need to eat – so remember stocking the pantry and fridge is going to be a necessity.

Are you now ready to find the rental property of your dreams?  Now you’ve got the basics covered, you should be in a good place to find and secure your new home. To get started, why not explore The Hopkins Group’s current listings or contact our property management team today!

Stay up to date

Get the latest news and insights from The Hopkins Group, as it happens.

Newsletter

Name(Required)
This field is for validation purposes and should be left unchanged.
The Hopkins Group

Street Address

Level 23, 500 Collins Street, Melbourne, VIC 3001

Postal Address

GPO Box 4347, Melbourne, VIC 3001

Office Hours

8:30am - 5:00pmMonday - Friday (after hours by appointment)
© 2023 The Hopkins Group | All Rights ReservedPrivacy PolicyDisclaimer PolicyDeveloped by Digital Six